
순한맛 26 패치강좌 1 플러터 2.0 Snack bar와 ScaffoldMessenger
- Why ScaffoldMessenger?
기존
Scaffold 위젯
▲
Center 위젯
▲
FlatButtond 위젯
▲
Scaffold.of(Context)
> Scaffold. 메소드가 의미하는 건 현재의 BuildContext에서 위로 거슬러 올라가며 가장 가까운 Scaffold 찾아서 반환
하지만 Scaffold. 메소드가 가지고 있는 현재의 Context로는 찾을수가 없었음
그래서 Builder 위젯을 만들어서 새로운 Context를 Scaffold. 메소드가 전달받게 한 후, 그 위치부터 Scaffold 위치를 찾아나서게 함
이 때 생기는 문제점

> 주문확인 페이지에서 구현된 Snackbar는 주문확인 페이지에서만 사용가능. 주문확인 페이지의 BuildContext 상에서만 구현되어 사용 가능.
배송알림 페이지(다른 라우터)로 이동하게 되면 바뀐 페이지의 BuildContext를 사용하게 되고 Scaffold 위젯도 바뀌기 때문
해결법
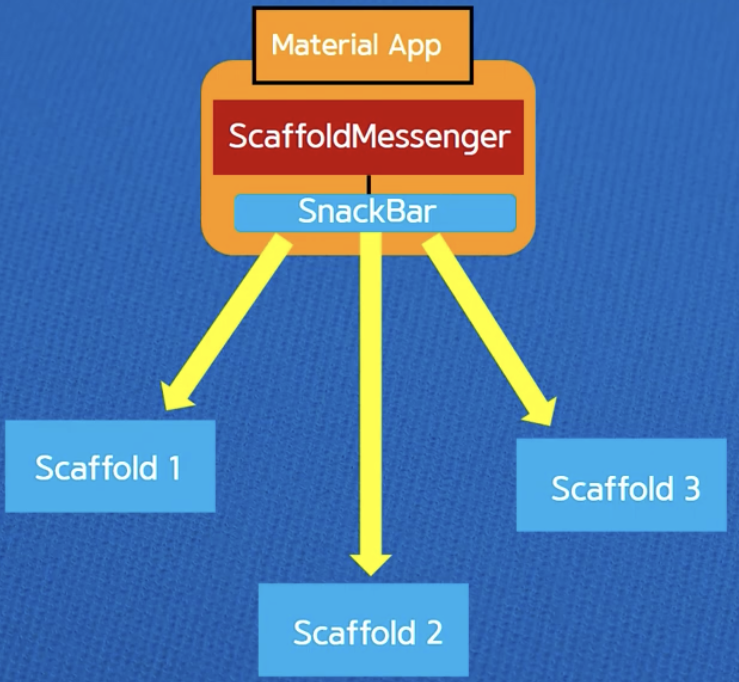
위젯트리 최상위 위치에서 흩어져있는 자손 Scaffold 위젯을 등록해서 SnackBar를 수신할 수 있도록 한데 묶어 관리하는 것 = ScafflodMessenger (플러터 2.0 이후 패치됨)
ScafflodMessenger :
1. Manages SnackBars for descendant Scaffolds.
자손 Scaffold들을 위해 스낵바를 관리한다.
2. By default, a root ScaffoldMessenger in included in the MaterialApp.
MaterialApp(위젯트리 최상단)에 ScaffoldMessenger를 포함 하고 있다.
= 라우터(페이지)가 바뀌어도 스낵바를 사용할 수 있다.
실습코드
import 'package:flutter/material.dart';

void main() => runApp(MyApp());

class MyApp extends StatelessWidget {
  @override
  Widget build(BuildContext context) {
    return MaterialApp(
      theme: ThemeData(
        primarySwatch: Colors.blue,
      ),
        home: MyPage(),
    );
  }
}

class MyPage extends StatelessWidget {
  const MyPage({Key? key}) : super(key: key);

  @override
  Widget build(BuildContext context) {
    return Scaffold(
      appBar: AppBar(
        title: Text('ScaffoldMessenger'),
      ),
      body: HomeBody(),
      floatingActionButton: FloatingActionButton(
        child: Icon(Icons.thumb_up),
        onPressed: () {
          ScaffoldMessenger.of(context).showSnackBar( // 1.Scaffold.of 메소드는 가장 가까운 Scaffold 위치를 찾아서 반환하라는 의미.
            SnackBar(				//  ScaffoldMessenger에는 모든 자손 Scaffold가 등록되어 있어서 가장 가까운 Scaffold 위치를 반환함.
                content:Text('Like a new Snack bar!'),
            duration: Duration(seconds: 5),)
          );
        },
      ),
    );
  }
}

class HomeBody extends StatelessWidget {
  const HomeBody({Key? key}) : super(key: key);

  @override
  Widget build(BuildContext context) {
    return Center(
      child: ElevatedButton(
        child: Text('Go to the second page'),
        onPressed: () {
          Navigator.push(
          context,
          MaterialPageRoute(builder: (context) => SecondPage()),
          );
        },
      ),
    );
  }
}

class SecondPage extends StatelessWidget {
  const SecondPage({Key? key}) : super(key: key);

  @override
  Widget build(BuildContext context) {
    return Scaffold(
      appBar: AppBar(
        title: Text('Second Bar'),
      ),
      body: Center(
        child: Text('좋아요가 추가 되었습니다.',
        style: TextStyle(
          fontSize: 20.0,
          color: Colors.redAccent,
        ),),
      ),
    );
  }
} |
 |
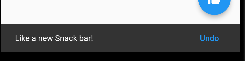
> 왼쪽페이지(HomeBody)에서 스낵바를 띄운 상태에서 오른쪽페이지(SeceondPage)로 이동해도 여전히 스낵바가 떠있는 것을 확인할 수 있음
// class MyPage

SnackBar(
                content:Text('Like a new Snack bar!'),
            duration: Duration(seconds: 5),
            action: SnackBarAction( // SnackBarAction 스낵바의 버튼. 예시)실행 취소 버튼
              label: 'Undo',
              onPressed: () {
                Navigator.push(
                    context,
                    MaterialPageRoute(builder: (context) => ThirdPage()),
                );
              },
            ),)
SnackBarAction 스낵바의 Undo 버튼 클릭 시, 3번째 페이지로 이동하는 코드
 |
 |
 |
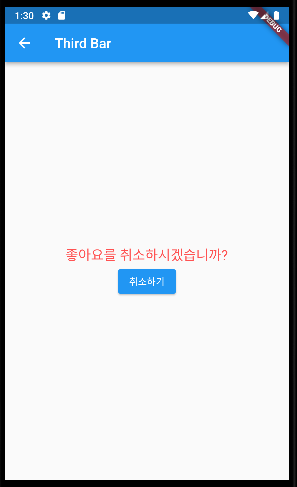
▲실행결과 및 코드▼
// 추가된 thirdPage

class ThirdPage extends StatelessWidget {
  @override
  Widget build(BuildContext context) {
    return Scaffold(
      appBar: AppBar(
        title: Text('Third Bar'),
      ),
      body: Center(
        child: Column(
          mainAxisAlignment: MainAxisAlignment.center,
          children: [
          Text(
            '좋아요를 취소하시겠습니까?',
            style: TextStyle(fontSize: 20.0, color: Colors.redAccent)
          ),
            ElevatedButton(
                onPressed: () {
                  ScaffoldMessenger.of(context).showSnackBar(
                      SnackBar(
                        content: Text('좋아요가 취소되었습니다'),
                        duration: Duration(seconds: 3),
                      ),
                  );
                },
                child: Text('취소하기'),
            ),
            ],
          ),
        ),
    );
  }
}
그럼 만약 한 페이지에서 스낵바를 띄우고 다른 페이지로 이동시 해당 스낵바가 띄워지지 않게 하려면?
> MaterialApp의 ScaffoldMesseger를 사용하는게 아니라 이전과 비슷하게 개별적으로 ScaffoldMesseger를 생성해서 사용해야함
class ThirdPage extends StatelessWidget {
  @override
  Widget build(BuildContext context) {
    return ScaffoldMessenger( // 1)
      child: Scaffold(
        appBar: AppBar(
          title: Text('Third Bar'),
        ),
        body: Builder( // 3)
          builder: (context) { // 4)
            return Center( // 5)
              child: Column(
                mainAxisAlignment: MainAxisAlignment.center,
                children: [
                Text(
                  '좋아요를 취소하시겠습니까?',
                  style: TextStyle(fontSize: 20.0, color: Colors.redAccent)
                ),
                  ElevatedButton(
                      onPressed: () {
                        ScaffoldMessenger.of(context).showSnackBar( // 2)
                            SnackBar(
                              content: Text('좋아요가 취소되었습니다'),
                              duration: Duration(seconds: 3),
                            ),
                        );
                      },
                      child: Text('취소하기'),
                  ),
                  ],
                ),
              );
          }
        ),
      ),
    );
  }
}1) 여기에만 따로 ScaffoldMessenger 생성
2) 해당 ScaffoldMessenger.of 메소드에 전달된 context로는 여기 Scaffold를 찾을 수 없게 됨
왜냐면 1)의 ScaffoldMessenger는 MaterialApp이 제공하는 root ScaffoldMessenger가 아니기 때문에 자손 Scaffold에 대한 정보가 없기 때문
그래서 이전과 같이 Scaffold 아래에서 Builder 위젯에서 새로운 Context를 생성해 ScaffoldMessenger.of 메소드에 전달해줘야함
3) 새로운 context 생성하기 위해 Builder 위젯 사용
4) context 생성
5) builder 위젯은 return 필수이기에 Center를 리턴
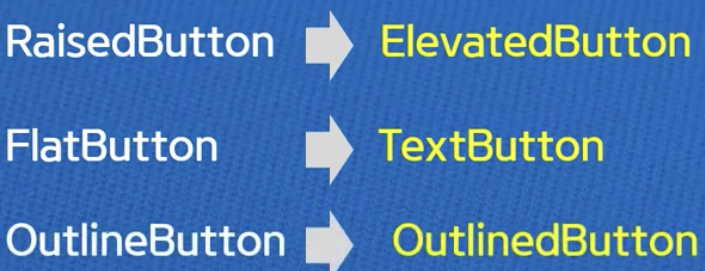
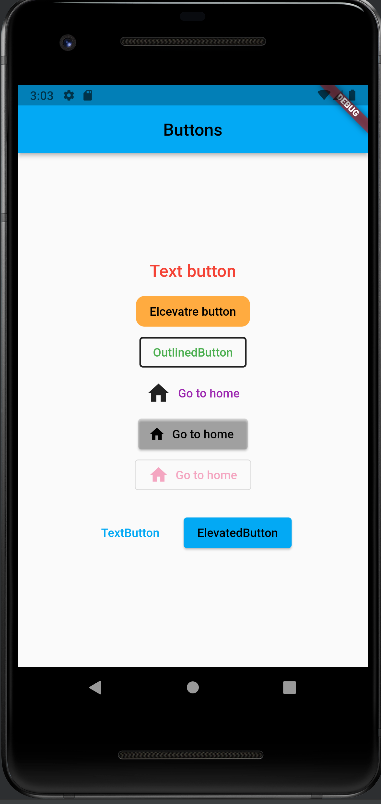
순한맛 27 패치강좌 2 플러터 2.0 버튼 Elevated button, Text button, Outlined button
플러터 2.0 이후 바뀐 버튼들
- TextButton
TextButton(
    onPressed: () { // 기본적인 버튼 클릭. 짧게 눌렀을 때 반응
    },
  onLongPress: () { // 버튼을 길게 눌렀을때 반응
    print('text button');
  },
    child: Text(
      'Text button',
      style: TextStyle(
        fontSize: 20.0
      ),
    ),
  style: TextButton.styleFrom(
    primary: Colors.red, // 텍스트 글자색
    // backgroundColor: Colors.blue // 배경색
  ),
),( * 주의 Text Button에서 primary = 글자색 / backgroundColor = 배경색)
+ 나의 경우 TextButton에서 onPressed를 삭제하고 onLongPress만 사용하려고 하면 에러라고 뜬다.
이후 버전에서 또 패치가 되었을 수 있을듯.
- ElevatedButton
ElevatedButton(
    onPressed: () {
      print('Elevated button');
    },
    child: Text('Elcevatre button'),
style: ElevatedButton.styleFrom(
  primary: Colors.orangeAccent, // 배경색
  shape: RoundedRectangleBorder( // shape : 모양, RoundedRectangleBorder: 디자인버튼 모양 둥근 형태로
    borderRadius: BorderRadius.circular(10.0) // 둥글기 각도
  ),
  elevation: 0.0 // 버튼 뒤 그림자
),
),( * 주의 ElevatedButton에서 primary = 배경색, 글자색이나 배경지정은 따로 없음)
- OutlinedButton
OutlinedButton(
    onPressed: () {
      print('OutlinedButton');
    },
    child: Text('OutlinedButton'),
style: OutlinedButton.styleFrom(
  primary: Colors.green, // 글자색
  side: BorderSide( // 외곽선 변경
    color: Colors.black87, // 외곽선 색깔 변경
    width: 2.0 // 외곽선 두께
  ),
),
),
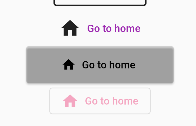
- ~Button.icons
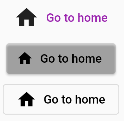
TextButton.icon( // 버튼 앞 아이콘 추가할때 .icon
                    onPressed: () {
                      print('Icon button');
                    },
                icon: Icon(
                    Icons.home,
                  size: 30.0,
                    color: Colors.black87,
                ),
                label: Text('Go to home'),
            style: TextButton.styleFrom(
              primary: Colors.purple, // 여기서 만약 Icon에 색상을 지정하지 않았다면
                                      // primary에서 지정한 색으로 아이콘도 함께 지정
            ),
            ),
            ElevatedButton.icon( // 버튼 앞 아이콘 추가할때 .icon
              onPressed: () {
                print('Go to home');
              },
              icon: Icon(
                Icons.home, size: 20.0,
              ),
              label: Text('Go to home'),
              style: ElevatedButton.styleFrom(
                primary: Colors.black12,
                minimumSize: Size(200, 50), // Button  크기 변경시
              ),
            ),
            OutlinedButton.icon( // 버튼 앞 아이콘 추가할때 .icon
              onPressed: null, // 버튼 비활성화
              icon: Icon(
                Icons.home
              ),
              label: Text('Go to home'),
              style: OutlinedButton.styleFrom(
                primary: Colors.black,
                onSurface: Colors.pink, // 비활성화된 버튼에 색상 변경
              ),
),* minimumSize에서 계속 빨간 줄이 뜬다. 왜일까 const도 붙여보고 위에 import 하라는거도 해봤는데 비슷한 오류를 해결한 사람이 없다..,..
결국 스택오버플로우에서 sizedbox나 container로 감싸라고 하니 예제처럼 잘 나온다...
SizedBox(
  width: 200,
  height: 50,
  child: ElevatedButton.icon( // 버튼 앞 아이콘 추가할때 .icon
    onPressed: () {
      print('Go to home');
    },
    icon: Icon(
      Icons.home, size: 20.0,
    ),
    label: Text('Go to home'),
    style: ElevatedButton.styleFrom(
      primary: Colors.black12,
      // minimumSize: const Size(64, 36), // Button  크기 변경시
    ),
  ),
),참조 : https://stackoverflow.com/questions/50293503/how-to-set-the-width-and-height-of-a-button-in-flutter
- buttonBar : 왼쪽과 같이 아래 두 개의 버튼을 끝정렬 시켜주는 것. 만약 자리가 없다면 자동으로 오른쪽처럼 세로정렬도 해줌
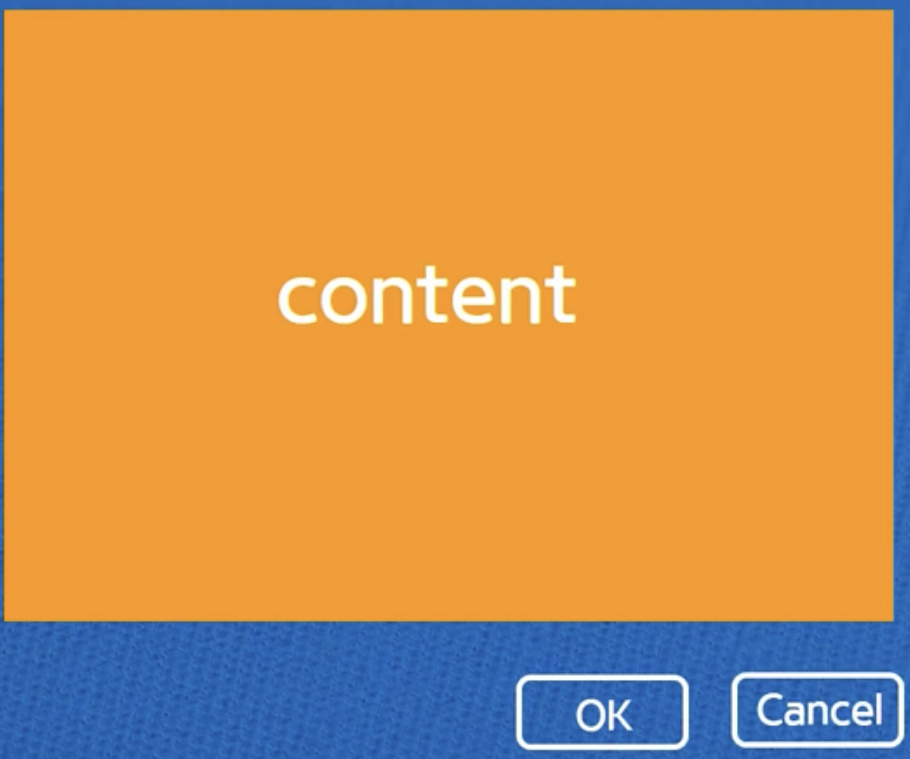 |
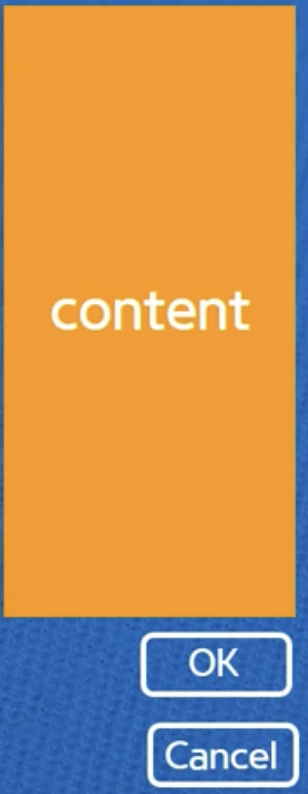 |

 ButtonBar(
              alignment: MainAxisAlignment.center, // 중앙 정렬
              buttonPadding: EdgeInsets.all(20), //두 버튼 사이 간격
              children: [
                TextButton(onPressed: () {},
                    child: Text('TextButton'),
                ),
                ElevatedButton(onPressed: () {},
                    child: Text('ElevatedButton'),
                ),
              ],
            ),
전체 코드
import 'dart:ffi';
import 'dart:ui';

import 'package:flutter/material.dart';

void main() => runApp(MyApp());

class MyApp extends StatelessWidget {
  const MyApp({Key? key}) : super(key: key);

  @override
  Widget build(BuildContext context) {
    return MaterialApp(
      theme: ThemeData(
        primarySwatch: Colors.lightBlue,
      ),
      home: MyButton(),
    );
  }
}

class MyButton extends StatelessWidget {
  @override
  Widget build(BuildContext context) {
    return Scaffold(
      appBar: AppBar(
        title: Text('Buttons'),
        centerTitle: true,
      ),
      body: Center(
        child: Column(
          mainAxisAlignment: MainAxisAlignment.center,
          children: [
            TextButton(
                onPressed: () { // 기본적인 버튼 클릭. 짧게 눌렀을 때 반응
                },
              onLongPress: () { // 버튼을 길게 눌렀을때 반응
                print('text button');
              },
                child: Text(
                  'Text button',
                  style: TextStyle(
                    fontSize: 20.0
                  ),
                ),
              style: TextButton.styleFrom(
                primary: Colors.red, // 텍스트 글자색
                // backgroundColor: Colors.blue // 배경색
              ),
            ),
            ElevatedButton(
                onPressed: () {
                  print('Elevated button');
                },
                child: Text('Elcevatre button'),
            style: ElevatedButton.styleFrom(
              primary: Colors.orangeAccent, // 배경색
              shape: RoundedRectangleBorder( // shape : 모양, RoundedRectangleBorder: 디자인버튼 모양 둥근 형태로
                borderRadius: BorderRadius.circular(10.0) // 둥글기 각도
              ),
              elevation: 0.0 // 버튼 뒤 그림자
            ),
            ),
            OutlinedButton(
                onPressed: () {
                  print('OutlinedButton');
                },
                child: Text('OutlinedButton'),
            style: OutlinedButton.styleFrom(
              primary: Colors.green, // 글자색
              side: BorderSide( // 외곽선 변경
                color: Colors.black87, // 외곽선 색깔 변경
                width: 2.0 // 외곽선 두께
              ),
            ),
            ),
            TextButton.icon( // 버튼 앞 아이콘 추가할때 .icon
                    onPressed: () {
                      print('Icon button');
                    },
                icon: Icon(
                    Icons.home,
                  size: 30.0,
                    color: Colors.black87,
                ),
                label: Text('Go to home'),
            style: TextButton.styleFrom(
              primary: Colors.purple, // 여기서 만약 Icon에 색상을 지정하지 않았다면
                                      // primary에서 지정한 색으로 아이콘도 함께 지정
            ),
            ),
            ElevatedButton.icon( // 버튼 앞 아이콘 추가할때 .icon
              onPressed: () {
                print('Go to home');
              },
              icon: Icon(
                Icons.home, size: 20.0,
              ),
              label: Text('Go to home'),
              style: ElevatedButton.styleFrom(
                primary: Colors.black12,
                // minimumSize: Size(200, 50), // Button  크기 변경시
              ),
            ),
            OutlinedButton.icon( // 버튼 앞 아이콘 추가할때 .icon
              onPressed: null, // 버튼 비활성화
              icon: Icon(
                Icons.home
              ),
              label: Text('Go to home'),
              style: OutlinedButton.styleFrom(
                primary: Colors.black,
                onSurface: Colors.pink, // 비활성화된 버튼에 색상 변경
              ),
            ),
            ButtonBar(
              alignment: MainAxisAlignment.center, // 중앙 정렬
              buttonPadding: EdgeInsets.all(20), //두 버튼 사이 간격
              children: [
                TextButton(onPressed: () {},
                    child: Text('TextButton'),
                ),
                ElevatedButton(onPressed: () {},
                    child: Text('ElevatedButton'),
                ),
              ],
            ),
          ],
        ),
      ),
    );
  }
}
'공부 > Flutter' 카테고리의 다른 글
| Flutter 스터디 13 플러터 ListView builder와 Dialog (0) | 2023.02.02 |
|---|---|
| Flutter 스터디 12 플러터 Onboarding screen (0) | 2023.02.02 |
| Flutter 스터디 10 Collection과 Generic (Generics 보충) (0) | 2023.01.30 |
| Flutter Navigator/context 퀴즈 (0) | 2023.01.30 |
| Flutter 스터디 9 Navigator 와 PushNamed Method (0) | 2023.01.30 |